Friday, August 31, 2012

Favorite Summer Eyeshadows

Summer.Sunshine.Hot.
Clear keywords for the past three months.

It's been warm,then it got warmer,then it got back to being warm and it stayed like that.Even as I type this, it's 28 Degrees outside. Which meant that my face has seen as little make-up as possible. You can imagine that at 40+ C temperatures, you don't really want to feel anything than a cool breeze.

As far as colors go, I like shades that accentuate the tan or that work well on a sunkissd skin. That's why the following eyeshadows have been definite favorites.


I stumbled on them by compete accident and said "Why not,let's try it!". I'm so glad I did!
They are pearly, bronze beauties!

Both from Catrice,  we have Mr.Copper's Fields and Oh,It's so Toffeeful!


Mr.Copper's Fields  is a dark copper shade, as the name says, and it gives a perfect accent when combined with Oh,It's so Toffeeful! The latter is a shiny light bronze color that gives your eye a subtle glow. I love it! Even used it as a sorta bronzer and it looked gorgeous!


Last but not least, here's what it looks like on my eyes.


What's your favorite eyeshadow? Do you have any colors that you love and couldn't do without?


                                     You can also Follow on * Twitter * FacebookBloglovin *

Thursday, August 30, 2012

The All-Round Talent: Aloe Lips

For years now, this lip balm has been my go-to everything miracle balm. It not only helps my lips, but it also calms skin, helps my eyes if they feel puffy and is all in all a trusty companion. Of course, because it contains Aloe AND Jojoba Oil , it is able to do all this better than many others.


This beautiful balm is made by Forever Living Products and I don't know how it is in your country, but where I live, you need to be a member or know a member in order to get your hands on it. But this really shouldn't be a problem, since they are active in most, if not all parts of the world.

It's very practical because it comes in stick form and you don't have to put your finger in it each time you want to apply it. Keeps the whole thing a bit more hygienic.

What It Does:

The question should be: What doesn't it do?
Both Aloe and Jojoba Oil  are known for their skin healing and restoring properties and I must say, it has never failed in doing so!
Dry lips - fixed
Rash - fixed
Burns - fixed
Dry skin - fixed

I'm starting to think what else I could use it for, since it seems to be able to make pretty much anything skin related better.
I've even seen people put it on a herpes they had on their lips and within 24-48 hrs it was gone. Now I've never had it, but I hear those things hurt like a mother and are also awfully hard to get rid of.


The Ingredients:


Sure, I always prefer seeing a short ingredient list, but this one is pretty ok too, if you consider all the good things it does.
Compared to others, it does have a shorter ingredient list and by far more natural ingredients.


All in All

I've been using it for years and will keep doing so. It's an absolute must have every time I travel and I always keep one in my pocket!

Do yo have any wonder balm yourself? I'd love to try it out!


                                     You can also Follow on * Twitter * FacebookBloglovin *


Wednesday, August 29, 2012

GUEST POST: Gosia's Glittery Nail Show & Tell!


Hello to all Treasure Chest readers!!

My name is Gosia and I’m a host of Life In Color!, one of the many nail blogs out there.  Joanna and I just recently have become acquainted when she decided to join our Monday Blues team!!  I love how her blog contains a little bit of everything, including some great advice and fabulous pictures!

I tried to come up with something that Joanna would like, and I KNOW that she likes glitter!  Just look at her awesome nail posts, so many of them show glitter!!  Therefore I’ve decided to use some too!


First, I used “underwear” polish, in this case 2 coats OPI “Don’t Pretzel My Buttons” which I got from the latest OPI Germany collection.  For my accent nail I used 2 coats of China Glaze “Snow”.


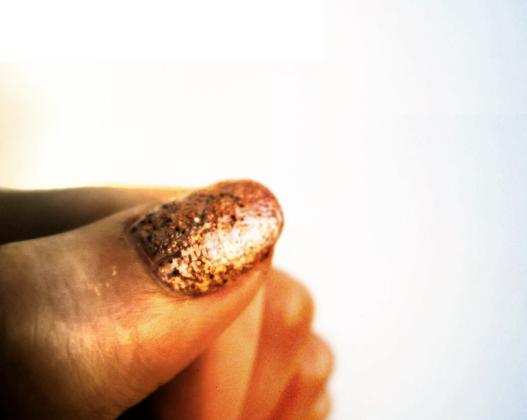
Then I applied 2 coats of China Glaze “I Herd That” (from the 2012 Safari collection) and freehanded a little design on my accent finger.  I really really like this polish; it’s a very densely packed yellow and red glitter in a clear base.  If there is such a thing, I would call it a nude glitter!!  Very not-in-your-face but still sparkly and pretty!!


 In sunlight

 
I hope you guys all enjoyed my little creation!!  Thank you so much, Joanna, for letting me entertain your guests today!!!  


                                     You can also Follow on * Twitter * FacebookBloglovin *

Tuesday, August 28, 2012

The Amazing Apricot Oil

I've learned pretty fast that natural skin care products are the best when they either are purchased from or in the country of origin, or in countries which still have a good connection with the roots of beauty.

That's why, after trying several things out, I've come to the conclusion that in Romania, you might find the best face cream ever! ( Gerovital ) and that getting oils from there is also a brilliant idea, especially such as Apricot Kernel Oil, which they produce.


Not to mention the fact that getting them straight from the source is always cheaper!


That is why I picked up this one. 10 ml for 2 Euro is a bargain if you ask me, especially for such a great product.And you can find this oil at pretty much every pharmacy there.


What makes it amazing?

Let's start off by saying it has a very high Vitamin E content.Vitamin E is one of your skin's favorite things.It needs it to stay in shape and glowing.
It is a very mild oil and it's often used in baby products. If baby skin likes it, there's a good chance your skin will too.
"Rich in essential fatty acids like oleic and linoleic acid, apricot kernel oil is high in vitamin A. Since it easily penetrates the skin, it is good oil for prematurely aged, dry or irritated skin. The excellent softening and moisturizing properties is great for face, hands and hair. Vitamins A & C are good for mature dry or sensitive skin. The apricot kernel oil helps skin retain elasticity, clarity, and suppleness. Crushed Apricot Kernels are commonly used as a facial mask to soften the skin."

In traditional Chinese medicine, apricot oil is used to calm the skin and irritations caused by eczema or dermatitis.It also has anti-inflamatory properties, which means it reduces swelling. Not to mention that it is ideal for acne and acne prone skin as it also known for reducing said condition.

As a matter of fact, if you want to use it for acne:
Mix 1 ounce of apricot kernel oil
12 drops of lavender essential oil
7 drops of tea tree essential oil and
1 drop of geranium essential oil in an amber colored clean bottle.
Then apply to the needed areas of your skin.


A great thing about it is, that because it is such a gentle oil, it penetrates your skin without leaving any fatty residue, which, if you have some patience and let it sink in, will make it a great make-up base!


From what I've tried on my face and a weird  new rash on my arm, I can say it has indeed made my face look brilliant and my rash slowly go away. All you need is a couple of drops in the palm of your hand and you're good to go!


All in all

I say you MUST give it a try and you will see that you will not be sorry!


                                  You can also Follow on * Twitter * FacebookBloglovin *

Monday, August 27, 2012

Monday Blues: BarryM Aqua Glitter

Hellooooo Monday! Way too much cheerfulness in that statement,wasn't it?
Let's try again:
Oh hey!
Sounds more plausible. Now let's get to the awesome part, The Glitter! BarryM Aqua Glitter to be exact.

On Saturday, the lovely Mihaela handed me this bottle of unicorn...eh...tears, and whatever post was planned could wait, because I had to have it on my nails and show it off!


Because I am part of Monday Blues, that you can read all about in my post from last week and see the previous blue and gold leaf nail art tutorial I did then, I am posting pretty blue things each Monday.

I'm wearing 3 coats on these photos and nothing but a base coat underneath. As you can see, it does a pretty great job in terms of coverage.
What I was super surprised by was how easy you can take it off! 
Alu foil and scrubbing glitter off? Not At All!
It came off just like any other nail polish.With a rub of the cotton pad and the polish remover it was gone forever.


I am in total and absolute like with this polish!
It also is the perfect aqua, as the name says.I have quite a bunch of blue glitters, but none really hit that perfect blue color that you want to have on your nails on a hot summer day where all you can think of is jumping into a sea of blue.


Do you have any glitters you're dying to get your hands on? This was on my Wishlist for a very very long time!

Also, make sure you check out what the other lovely blue ladies have in store for you today:

Gosia from Life in Color!
Mihaela from Lacquerbuzz
Mandy from Chameleon Stampede
Marisa from Polish Obsession


                           You can also Follow on * Twitter * FacebookBloglovin *

Sunday, August 26, 2012

Oreo Cupcakes!

One of my ultimate passion is baking cupcakes.

Small, cute and delicious, they bring the perfect satisfaction to your sweet tooth!

A while back, I came across a recipe that included Oreos. Oreos and cupcakes? The two things I could eat at any time? Sounds perfect!

Let me tell you how to do it!


You might know how to bake a basic cupcake, if not, THIS is one of the simplest recipes to do it. Just know you can use any flower, self rising or not. And to make a chocolate cupcake, add a tablespoon of cocoa powder to the recipe.
Try to get a paste that is somewhat runny. A stiff dough will result in a pretty dry cupcake. Of course if you like your cupcakes dry, add more flour and make it stiff.

How do we get the Oreo in it?

SIMPLES! As our meerkat friend would say.

After having your mixture ready, put your cupcake liners in the cupcake pan. At the bottom of each liner, you should then place a glorious Oreo. Then pour the cupcake dough over it.
Try to only fill 3/4 of the liners, so that it doesn't spill over or stay too low. You don't want a Big Mac Cupcake, but then again you don't want a mini either.


Bake for 18-20 minutes and enjoy!

Frosting:

I spent a bit too much time and went a complicated way to make the chocolate cream you see here.
What I will suggest is the following: Use Nutella!
Easy and effective, it will taste delicious and will save you a lot of time!


It's fast, easy and so delicious! Remember, eat that Oreo Cupcake right and dip it in milk to get the cookie feeling at home! And of course let me know how it goes once you try it!


                          You can also Follow on * Twitter * FacebookBloglovin *


Saturday, August 25, 2012

My Absolute Beauty NO-GOs

I think all of us have our pet peeves when it comes to beauty and beauty products. I'm sure each of you has at least one of those things that will make you go OH NO! and will result in making you less than happy.
Well,so do I.That's why I made a list of the things I really dislike, be it the attributes of a specific product, the frustration that some others give,or simply things that I cannot believe can happen to someone who says they like beauty and like to take care of themselves.

To the right, you can see my TOP 6 "Please don't!"s, starting with my personal frustration and obvious incapacity of applying mascara when you give me a rubber brush and ending with the cringing that always happens when I see people walking around with chipped nail polish, or even worse, just a bit of nail polish remaining on their nails!
I'm going to go into detail with each of them as we go along, and I'm going to be very curious what your pet peeves are, once I'm done.


Rubber Bristles on Mascaras and Plastic Hairs on Brushes


They wanna make me use all those things but I said No,No,No!
1. I mean it! Don't give me a mascara that has rubber bristles. I might not be good at applying it, or my eyelashes simply don't fully understand its good intentions, I really do not know, but I can tell you that my lashes never look good when such a mascara brush touches them. They end up clumpy, stuck together, and all in all not too pretty. I always get a feeling that they are super heavy and it's very uncomfortable. I've tried. I've tried time and time again to give it one more try, but it just doesn't apply right. Sorry rubber bristles, but I don't like you.

2.  I suspect I'm not the only one who isn't a fan of plastic hairs on brushes that you are supposed to apply your make-up up evenly with. It never works. The powder doesn't stick well, it does everything but apply it evenly and when you clean it, it's like cleaning saran wrap. Once again, I'm sorry but you are not touching me again.


Awful Smelling Lip Balms and The Sudden Shock in Your Hair


3. I'm a big fan of lip balms but when I opened this therapeutic little fellow I felt like I just entered a housewife's living space during spring cleaning. It smelled like orange toilet cleaner mixed with bleach and some other chemicals I can only imagine carpets are being cleaned with. This thing has never touched my lips simply because the smell put me off so bad that I couldn't even imagine letting it come in contact with any part of my body.
It's especially disappointing when you look forward to using a product and the smell is just so bad that it robs you of any and every joy you might have had. Not funny.

4. Has THAT ever happened to you? If you have long hair like me, then I'm pretty sure it has. You're just minding your own business, trying to get that hair in a pony tail as tight as possible so it doesn't move when you run to where you have to be in 5 minutes and BAM! your trusty hair elastic pops open and becomes double in size and close to breaking. Hair is not gonna sit well and you know it can and will break when you least need it to.
The imminent death of the elastic is one of those laws that Mr. Murphy would have mentioned if he would have been a woman, I am sure!

and last but not least

Inefficient Razors and Chipped Nails

5. We've all been there: jumping in the shower in the morning, grabbing the new razor we have just purchased and having high hopes that it will work with us as a perfect human-razor team, like the higher powers had intended it. Ah, but not so fast! Razor has other plans! You do a first shave just to find that half of what shouldn't be there is still there. You do another shave to find that the other half is now somewhat gone, but your skin is looking at you and asking why you've attempted to kill it. At this point, all you want to do is take the razor and throw it away, all the while wondering why can't you just do your job?

6. If you want to make me cringe, you just have to show me chipped nails and someone wearing them proudly. Still can't fully understand how someone can have no problem with the polish on the tips having  long left the building.
I intentionally chipped off my tips in the photo above and took the polish off immediately after, just in case you were wondering. The things we do for art, don't you think?
In my opinion, a manicure is done so that nails can look well-groomed and neat, not so hat they look even worse than before. I also have problems seeing nails with just a splat of color left somewhere in the middle of them. For me, it's just not pretty. Keep it tidy or take it off.


These have been my ultimate No-Gos when it comes to beauty, maybe you will agree with some and maybe you can tell me about yours! What are your pet peeves when it comes to beauty?


            You can also Follow on * Twitter * FacebookBloglovin *

Friday, August 24, 2012

GUEST POST Helena from The Edge of Beauty : August Favorites

Hey everyone! I'm Helena from The Edge of Beauty :) Joanna and I are doing a swop on our blogs today. Both of us are sharing some of our favorite products with the other's readers. Hopefully it’s something you will all enjoy and if you want to read Joanna's post then be sure to head over to my blog :)


I couldn't pick one favorite beauty product. I'm a beauty blogger and I have an addiction to so many different brands that it is hard to pick one over the other. Therefore I have tried to show you three products that I have found relatively recently that you may not have heard about/tried and I hope you will like.

Firstly we have the Mac Mineralize Charged Water Moisture Gel... I know, it's a mouthful! This was released with a recent collection from Mac called Heavenly Creatures Skin. It claims to leave you skin feeling soft and supple whilst hydrating it at the same time. I instantly fell in love with it when I tested it out in store and I have been addicted ever since. I have never used a moisturizer that leaves my skin feeling as soft as cashmere. It really is an amazing product and what’s better is that it performs well for me. I have oily/combination skin and therefore moisturizers can leave me feeling a little bit greasy. Thankfully the gel formulation helps to prevent that. So if you suffer with oily skin like myself, this could be a great solution for you.

Secondly we have the Taaj Eau Micellaire De L'himalaya, or as I like to call it, the best magic water ever! I discovered this for the first time when it arrived in my JolieBox a few months ago now. Since then I have gone on to repurchase a 500ml bottle and in my eyes nothing beats it. This cleansing water helps to remove all of your makeup in a gentle way. There is no need to cleanse your face afterwards but I still tend to do this. I have tried other cleansing waters such as the No7 version but that one can occasionally make me break out whereas I find that this one keeps my skin in immaculate condition. I am very happy with this product and it is definitely a keeper.

Finally we have the No17 Mirror Shine Lipstick in Beehive. I actually got recommended this by one of my readers and it is one of the best purchases I have made. This is the perfect pink nude lip that gives your lips some shine and life without needing any lip gloss. It also helps to keep your lips moisturizes better than any other standard lipstick would. Having said this, I wouldn't say that this is it's best quality. It looks stunning in pictures and is incredibly easy to apply. It’s cheap and overall a great everyday easy lipstick to wear. I would recommend this to people who are starting out with lipsticks and don't want to try anything to daring.

And that’s it! I hope that you found some of this helpful and maybe you can try a few things yourself if you haven’t already. I'm sure Joanna and I would love to hear your comments on your favorite products so please leave a message below and let us know.

I shall say bye for now but don't forget that you can find me over on my blog, or on twitter. Additionally, for more information on the products mentioned, just click on the link provided and you will be able to read more in-depth reviews :)

Thanks Joanna for letting me do this, and bye for now girls!

xxo

                                    You can also Follow on * Twitter * FacebookBloglovin *

Thursday, August 23, 2012

Glitter and Nail Polish Making Sneak Peak


Yesterday I came across a place that sold glitter and you can be sure I got some of the shiny stuff!


Why you ask? Because I really wanted to give frankening some polish a try. Frankening pretty much means making your own.
So far I had issues finding glitters anywhere and the idea of paying for overpriced stuff on Ebay wasn't on my to do list.

But then I found these guys.

And of course, last night I had to try and make some!
Here's my first attempt, and a tiny preview of what I'm gonna be showing you soon!
( Yes ,it's purposely a slight bit blurry, this is a Sneak Peak after all,isn't it? :)


Have you ever tried making your own polish?


                          You can also Follow on * Twitter * FacebookBloglovin *

Wednesday, August 22, 2012

My Soap of Choice : Adzuki Bean & Shea Butter

Today I will tell you about one of my favorite bath products.
Maybe you know by now that I'm a big fan of Shea butter, if not, you can read all about the miracle moisturizer in This Post .
But the moment I found a hand made soap WITH Shea butter , I immediately got it. And I will tell you, I was not disappointed at all!


I'll be honest and tell you I had no idea what the Adzuki bean was or what it did. I then found out it was a type of bean that grows in east Asia and the Himalayas,and that it is widely used in Japan, so check on the 'exotic ingredient'.
To be quite honest, I haven't figured out what skin properties it might have,as you actually have the bean in the soap, not some powder or extract.Maybe for an occasional exfoliation? Maybe to play in the shower? Or maybe it's the ideal prison soap, where you will have to bend to get the fallen bean when it detaches from your soap.

Bean close-up below.


I will admit that I really, really like the packaging and the red Adzuki bean looks great in the color palette and goes perfectly with the label design.


What is does and how it does it:

I'm a bigger fan of soaps than I am of shower gels,even if the latter tend to come in more smells most of the time. This soap for example has a very subtle scent that I like.
What it does is moisturizing your skin and NOT drying it out. And this fellow does that really well! I have dry skin and whatever I put on it ends up drying it out. Not the case with this soap!
Nobody was more surprised than me. Not even when shaving my legs did I feel that uncomfortable "my skin's so stretched out it's gonna break!".
I felt my skin comfortable and that is a very rare thing. The Shea butter really does its job well and whenever I find a bath product that keeps moisture in my skin, I will be impressed.

Ingredients:

The ingredient list is more or less vague,like so


With some additional info in dutch that says that "each soap base is made from a selection of plant based glycerin, rapeseed oil , olive, coconut, sunflower/ castor oil and unrefined shea butter."

I got this particular soap in Holland at a de Tuinen store but you can also find it on the online store of Herbapharm  for under 4 Euro if I remember well.


All in all 
I am DEFINITELY going to keep using this! I still have 2 spare ones for when the current one runs out.
If you can't get hold of this particular one, I recommend you look for soaps with Shea butter in their composition.Your skin will be impressed.
And like I always say: The less ingredients, the better!

Do you prefer using soaps or gels?


                          You can also Follow on * Twitter * FacebookBloglovin *

Monday, August 20, 2012

Monday Blues: Gold Leaf Nail Art

This is very exciting, because starting today, I'll be taking part in the Monday Blues, which is a manicure challenge, where every Monday, you post about the newest blue color that has been on your nails.

Since this is my first time,I wanted to be all cool and not keep it simple, so I decided to do something I had seen,wanted to but had not tried yet. In blue of course :)

Here's what I did


Yes, I normally don't use Photoshop for any of my nail posts,unless the true color doesn't come out in photos and I need to twitch it to make it look like the real deal. But in this case, it wasn't a post about the color, it was about the pattern, and since the lighting was awful for some reason, I went all Vogue on the picture. Looks pretty neat though, if I may say so.


If you're wondering HOW I did it, have no fear, tutorial is here!

The Quick and Easy HOW-TO

Despite what it looks like, it's easier to do than you might think.
You only need one thing: 
A plastic wrapper. Like a sandwich wrapper. I personally used the plastic bag the bread was in. You need one that is quite stiff, so that it holds its shape.


What do to:

Step 1. Paint your nails in the color of your choice. Monday Blues meant blue for me, but next time I am definitely doing black.

Step 2. Crinkle the plastic wrapper. Hold it in your hand and try to make a petal-like shape,like so


Step 3. Apply some gold polish on the crinkled wrapper with the brush. Try not to put too much polish on it. If you feel you have,then just dab the excess off on a paper or a paper towel.
Should look like this, just more crinkled, I let it loose when I was taking the photo.


Step 4. The Awesome Step!
Dab the gold polish filled foil on your nails. If you see there's not enough polish on your foil anymore, brush some more on.


And there you have it!


Make sure you check out the other ladies taking part in the Monday Blues Challenge to see what blues they used today:

Gosia from Life in Color!
Mihaela from Lacquerbuzz
Mandy from Chameleon Stampede
Marisa from Polish Obsession


                           You can also Follow on * Twitter * FacebookBloglovin *

Sunday, August 19, 2012

I Love ... Mango Papaya Bath and Shower Gel

For a long while I stopped using shower gels,because they dried out my skin in quite a ridiculous manner,but the day I smelled this shower gel,was the day I decided to give them a try again.


I've always liked the description on the I Love... products,and sitting in the shower and reading the bottle just makes me wanna cover myself in the whole deliciously smelling thing.
For the same reason,I'm really appreciative that they make such big bottles. More of the good stuff for me!


I was also pretty surprised that it didn't dry out my skin in the dramatic way I had expected it.
Another surprising thing was how long the delicious smell of mango and papaya lasted on my skin. With shower gels, you usually smell the scent when you're under the shower. You enjoy it for a couple of minutes and off it goes. This one, on the other hand, stayed with me long after I left the bathroom, and I was told I spread it out through the house quite a bit too. Call me a human house fragrance if you will.


The Ingredients:


As usual,  little 'ol me was happy when there were no parabens poking my eye on this list.The truth is, beside that, it contains many of the ingredients that every other shower gel uses.
I personally am a fan of "the shorter the ingredient list,the better", and ideally totally preservative free,  but that is quite hard to achieve with such products, so Paraben Free makes me jolly for now.


All in all:


I'm hooked on this yummy smelling shower gel! One thing you can be sure is that the nice people at I Love... will always come up with smells that will make you want to eat their products or at least leave your mouth watering!
Luckily enough, they also put a warning on the package, discouraging you to not eat it, as good as it may smell. And thank God for that! The temptation is too great!


 Have you tried any I Love... products? What's your favorite?


                           You can also Follow on * Twitter * FacebookBloglovin *


The Lemonade Collection Recipe

We've all had lemonade and we've all appreciate its refreshing abilities at least once this summer.
What I hadn't realized until recently was, lemonade doesn't just mean lemons!
I had this epiphany one afternoon as I was sitting on a terrace and saw they had all sorts of lemonades on their menu. Raspberry Lemonade? Ginger Lemonade? Melon Lemonade?  Tell me more!


What I can say is that I have become addicted to raspberry lemonade since,so I've been making it a lot.

My first question is: Can you make lemonade? If not,we will start with that.


What you need:

- Lemons (as much or as little as you want.I like the juice of about 2 squeezed lemons/ 500ml  of soda )
- Sugar,preferably brown. There is no exact quantity for this. Add some, taste, add some more if needed.
- Soda or regular water,but soda makes it more bubbly and yummy.
- Fruit of your choice: you can do strawberry, raspberry, mango, peach, orange, melon, ginger, mint etc. Go wild!

What you need to do:

- Mix lemon juice, soda and sugar together
- Blend or mash your fruits if they are mashable, If it's an orange,just squeeze the juice and add some slices.   If it's ginger,cut it in thin slices and squeeze it a bit so the flavor comes out
- Mix lemonade with fruit paste/juice/slices
- Throw in some ice cubes if you like to

And ENJOY! 


                           You can also Follow on * Twitter * FacebookBloglovin *

Friday, August 17, 2012

Nails On My To Do List


I've been getting more and more into nail art recently, and not the kind where you put 3D mushrooms on them, or draw smurfs, but the kind that is wearable and chic. In my opinion of course.

If you're still stuck on the 3D mushrooms, yes, I have seen nails where champignons were literally growing out of them.It sadly was not really my cup of tea but I'm sure they took a lot of effort to make.

What I want to show you are a couple of designs I'll be trying out on myself  in the immediate future, so stay tuned!
The images are from Pinterest, and you can find me and the pins I've used in this post there under LeTreasureChest .

I will start with this gorgeous matte and shiny combination.


I used to do stripes like this. Use a matte coat over the black base color and then do black stripes with the same base polish, just without it being mattified. It looks great,gives it a lovely velvety look and I'll admit, I've been eyeing this for a while.


Another beautiful thing are these framed nails with a twist.


The nude base is gorgeous, and this particular combination looks so chic! Now, if you don't have a dotting tool, here's what you can use as a substitute .


This beautiful thing I've discovered yesterday.


I am pretty sure that the way to do this is with a needle and too much polish on the tips but I'm drying to try it out and will let you know exactly how to do it once do, so stay tuned!


Yes,I'm a bit of a sucker for glitter.


It's nothing too unusual but I love the color combination and how fine the glitter is on the tips. This particular one might actually have been done with loose glitter or a glitter eyeshadow.Yes, you can do it with eyeshadow too, would you want to know how? Let me know!

What I also love  are almost gradient nails, which consist pretty much is a base color and a popping color on the tips. For example: neon yellow on a grey base. Or metallic green on black.


Yesterday,I discovered Louboutin Nails.


You heard right! Black on top, and always red underneath. I might give them a try, when my nails grow long enough. It seems Adele wore them at the Grammys this year and it all took off from there.


A design I really want to try are Map Nails.


They are just Newspaper Nails but then, with a map instead.As a matter of fact, you can pretty much put anything that's been printed on paper, on your nails. If you don't know how newspaper nails are done, let me know and I will do a tutorial for you, as they are super fun to do!


One thing I'm not keen on trying, unless you really want to see what they look like, are the apparent trend of the fall : Spice Nails

And no, sadly you don't get to put the Spice Girls on your nails.You put salt, pepper and any other spice of your choice on them.How? Just like caviar nails work. Wet polish, sprinkle of pepper, salt or the BBQ mix you have at hand.

Another gruesome one are the soil nails.
Just what you might think it is, but hope it isn't: Putting soil (aka ground from your garden) on your nails.


Would you like to know more about these? Should I demonstrate? Let me know.

What would you like to try out on your nails? Any designs you haven't tried but want to? I'm really curious about it!


                           You can also Follow on * Twitter * FacebookBloglovin *

Thursday, August 16, 2012

GUEST POST: Loving Your Nails by Sophia from Tattooed Tealady


Hi everyone! My name is Sophia and I run a little blog called Tattooed Tealady where I blog about every aspect of beauty, with a few lifestyle posts and book reviews thrown in the mix! The lovely Joanna recently asked me if I would like to do a guest post for her blog, and as doing guest posts is something I enjoy and find fun to do, I of course said yes! I hope you will like my guest post!
I recently wrote a post over on my own blog about looking after your hands and nails and how important I think it is to really take care of them. It was a popular post, so today I thought I would share with you my top three products for doing exactly that which I use on a daily basis!

Treat Your Hands and Nails


Burt’s Bees Hand Salve

Every now and then I get really dry skin on the sides of my fingers. I don’t know what causes it or why it happens, but I hate it. The Burt’s Bees Hand Salve is an absolute saviour for those times when my fingers are dry and in need of some TLC! It is an intensive hand treatment with a formula packed full of botanical oils, herbs and beeswax which moisturise rough and dry hands. It also smells lovely! 

Lush Lemony Flutter Cuticle Butter

This has got to be, out of all of my hand and nail products, my absolute favourite. For starters, it smells incredible. I use it on my cuticle, as well as any areas with intense dry skin such as my knees as elbows, every single day. The Lush Lemony Flutter keeps my cuticles looking healthy and soft and works to keep my nails as healthy as possible. I don’t think I have ever loved a hand and nail product as much as I love this! 

Balance Me Super Moisturising Hand Cream

A good hand cream is a must in any hand and nail care routine and one I have adored using lately is the Balance Me Super Moisturising Hand Cream. It is a luxuriously thick hand cream that sinks in quickly, with a beautiful scent of essential oils that leaves your hands feeling super soft!
So those are my current top three products for keeping my hands and nails in tip-top condition. I’d love to hear your thoughts on them; do you use any of these? If not, what do you use? You can find me over on my own blog which is Tattooed Tealady, and I also co-run a weight-loss blog called Bloggers Go Skinny. Alternatively, you can also find me on Twitter, I’m always happy to chat so send me a tweet @tattooedtealady!
Love, Sophia xo


                                                You can also Follow on * Twitter * Facebook *

Wednesday, August 15, 2012

Galaxy/ Starry Sky Nails: A Guide.

The whole thing started because I decided to give Galaxy Nails a try. I knew it was just a matter of sponging the Milky Way on but I just never felt like attempting it before.

So last night I did.
It was looking very promising until about step 3,when I decided to be less Milky Way and more like the pretty sky I could see outside.
It just took one move to confuse the galaxy that was in the making. I realized it only takes some well placed dark blue polish to ruin,in this case transform, this particular mani.

Here's what happened

Step 1 :  Apply black nail polish. This really can be any black polish,as long as it doesn't take forever to dry. Because as you will be sponging other polishes on it,if it hasn't dried,you will end up with black all over the place.


Step 2 :  Pick a white polish of your choice and sponge diagonally on the black nail,like so:
You can use any sponge,from make-up sponge,to cutting off a little piece of the kitchen sponge.


Step 3 : Apply the first color polish to the upper and lower edges of the white polish line. I used Catrice Iron Mermaiden, whose metallic multi chrome shimmer you can see. It's a bit messy,but I figured I'll clean it up at the end all together and not after each step.Would have been a bit useless to spend more time cleaning.


Step 4 : This is where Galaxy became Night Sky. If you want to keep the galaxy,you should sponge at the edges of the white line,keep some white visible,and create a nebula pattern. Well, I did no such thing.
I took the Catrice Blues Brothers Vol II and the W7 Metallic Mercury  and did some major cover-up work.
The blue is really effective in covering up,so if you're doing galaxy nails,use it sparsely or else it might ruin the galaxy. Also,make sure you use a small sponge when applying the blue,it can easily become too much.
I then put some glitter on it, a purple Saffron  in this case,and voila!


The End Result


As far as night skies go,I'm liking the result quite a lot. Next time I will do a proper Galaxy Nail post and not get distracted by pretty stars shining outside.


What I used:


From left to right:

*Saffron Glitter*Catrice Iron Mermaiden*Catrice Blues Brothers Vol II*W7 Metallic Mercury*


                                                You can also Follow on * Twitter * Facebook *


LinkWithin

Related Posts Plugin for WordPress, Blogger...